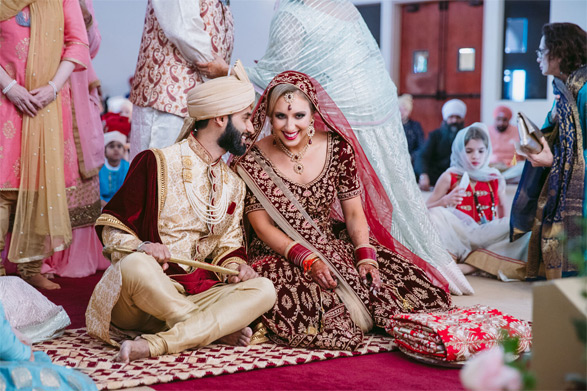
Mehndi Design Masterclass: Step by Step Tutorials for Brides to Be
Mehndi ArtistMehndi, or henna, has been a cherished tradition in many cultures for centuries. For brides-to-be, it’s not just a decoration but a symbol of joy, prosperity, and the beginning of a new chapter. If you're preparing for your big day and want to explore the art of mehndi, this masterclass will guide you through the essentials of creating beautiful designs. From basic techniques to intricate patterns, we'll provide you with step-by-step tutorials to help you achieve the perfect mehndi look for your wedding.
1. Understanding Mehndi: The Basics
What is Mehndi?

Mehndi is a form of body art that involves applying henna paste to the skin. The designs, often elaborate and detailed, are created using the natural dye derived from the henna plant. Traditionally, mehndi is applied during festive occasions and weddings believed to bring good luck and happiness to the bride.
The Significance of Mehndi in Weddings
In many cultures, mehndi plays a vital role in wedding rituals. It's not just about aesthetics; it's also a symbol of love and commitment. The designs often incorporate symbols of prosperity, fertility, and protection, making it an integral part of bridal celebrations.
2. Essential Tools and Ingredients
Henna Cone or Paste
You can either use a henna cone or make your henna paste. Ready-made cones are convenient and available in various colors and quality. If you prefer making your own, mix henna powder with water, lemon juice, and essential oils to achieve the desired consistency.
Applicator Tools
For precise application, consider using metal or plastic applicators. A fine-tip cone or a paintbrush can help in creating detailed designs. Having a range of tips allows for more intricate and varied patterns.
Supportive Items
Cellophane Wrap: To cover the mehndi and keep it moist.
Cotton Balls: For cleaning excess paste and applying oil.
Lemon Sugar Mix: Applied over the dried mehndi to enhance the color.
3. Basic Mehndi Techniques
Creating Simple Patterns
Start with basic patterns to build your confidence. Dots, lines, and spirals are great for beginners. These elements can be combined to form simple yet elegant designs. Practice on paper or your hand to get a feel for the paste's consistency and flow.
Applying Mehndi to the Skin
Ensure your skin is clean and dry before applying mehndi. Use a fine-tip cone to draw your design carefully. Apply the paste evenly and avoid touching the skin to prevent smudging.
4. Step-by-step tutorials for Bridal Designs
Classic Bridal Mehndi Design
Materials Needed:
Henna cone
Lemon sugar mix
Steps:
Preparation: Start by cleansing the bride's hands and feet.
Outline the Design: Use a fine-tip cone to draw the basic outline of the design on the palms, extending to the arms and feet.
Fill in the Design: Fill in the outlines with intricate patterns like paisleys, floral motifs, and geometric shapes.
Drying and Aftercare: Let the mehndi dry completely. Apply the lemon sugar mix to enhance the color and then wrap the hands in cellophane for better stain development.
Modern Mehndi Design
Materials Needed:
Henna paste
Thin brush or cone
Steps:
Design Concept: Choose a modern design like mandalas or minimalistic patterns.
Sketch the Design: Lightly sketch the design on paper or with a pencil on the skin to plan the placement.
Apply the Paste: Using a thin brush or cone, apply the paste, focusing on clean lines and consistent thickness.
Seal and Dry: Seal the design with cellophane and follow the aftercare steps to achieve a rich color.
Intricate Mehndi Patterns
Materials Needed:
High-quality henna paste
Fine applicator tools
Steps:
Detailed Design: Start with a detailed design featuring intricate patterns such as lacework or elaborate vines.
Precision Application: Use a fine applicator to ensure precision. Take your time to work on the details, and don’t rush.
Drying Process: Let the design dry naturally. Avoid using heat or blowing air as it can affect the color.
Color Enhancement: After drying, apply a lemon sugar mix to enhance the mehndi's color and wrap the area to prevent smudging.
5. Mehndi Aftercare: Ensuring Long-Lasting Color
Immediate Aftercare
After applying mehndi, keep the area dry and avoid washing it for at least 6-8 hours. The longer the paste stays on, the darker the stain will be.
Enhancing and Preserving the Color
Apply a lemon sugar mixture or essential oils to the dried mehndi to help deepen the color. Avoid exposure to water and excessive sweating immediately after application.
Removing the Paste
Once the mehndi is dry and has been left on for a sufficient amount of time, gently scrape off the paste. Avoid using water to wash it off, as this can affect the color.
6. Troubleshooting Common Issues
Dealing with Uneven Color
If the color appears uneven, it may be due to insufficient drying time or uneven application. Apply additional layers of paste to the lighter areas and follow proper aftercare to even out the color.
Preventing Smudges
To avoid smudging, ensure the paste is fully dry before touching or covering it. Using cellophane wraps can help protect the design while it dries.
Conclusion
Creating beautiful mehndi designs for a wedding is a rewarding experience that adds a personal touch to your special day. By mastering the basics and experimenting with various patterns, you can achieve stunning results that will enhance your bridal look. Remember, practice makes perfect, so take your time, enjoy the process, and let your creativity shine through.


